a trEATs affair

treats, travel & eats

  • Home
  • Baking
  • Cooking
  • Tutorial
  • travel
  • Meet Roxana
    • About a trEATs affair
    • Contact
  • Work with me
  • Ask a question
  • Recipe request
  • Privacy Policy
    • Disclosure policy
  • Home
  • Subscribe
  • Meet Roxana
    • Contact
  • Work with me
  • Baking
  • Cooking
  • Tips
  • travel
  • Ask a question
  • Recipe request

Bread Baking 101 – Baking with Yeast (types of yeast, proofing and a few tips)

January 30, 2013 by Roxana 30 Comments

Bread Baking 101 - Baking with Yeast (types of yeast, proofing and a few tips) from Roxanashomebaking.com

How to bake with yeast is probably the most asked question I get.  Well, today I’m going to share a couple of tips that will make baking with yeast a child-play.

In case you missed the previous posts of my Bread Baking Series, here are the links

Bread Baking 101 – Equipment

Bread Baking 101 – Commonly used ingredients : water, salt, sugar, milk, butter, oil, eggs

Bread Baking 101 – Commonly used ingredients : flour

Bread Baking 101 – Commonly used ingredients : yeast
Bread Baking 101 - Baking with Yeast (types of yeast, proofing and a few tips) from Roxanashomebaking.com

First, what is yeast?

Yeast is the only alive ingredients used in bread (sometimes I think that’s why some people are scared of it). It is made up of microscopic single-celled fungus, Saccharomyces cerevisiae. When it gets in contact with a warm liquid(water or milk) and fed with sugar and flour, it starts giving off tiny bubbles of carbon dioxide gas. This gas, trapped between the gluten webs, is what makes bread rise and achieve its light texture.

Yeast is the most popular leavening agent for bread baking. It is really easy to use, and once you’ve mastered it, there’s no going back to the store-bought bread. Baking your own bread is magical.
Bread Baking 101 - Baking with Yeast (types of yeast, proofing and a few tips) from Roxanashomebaking.com

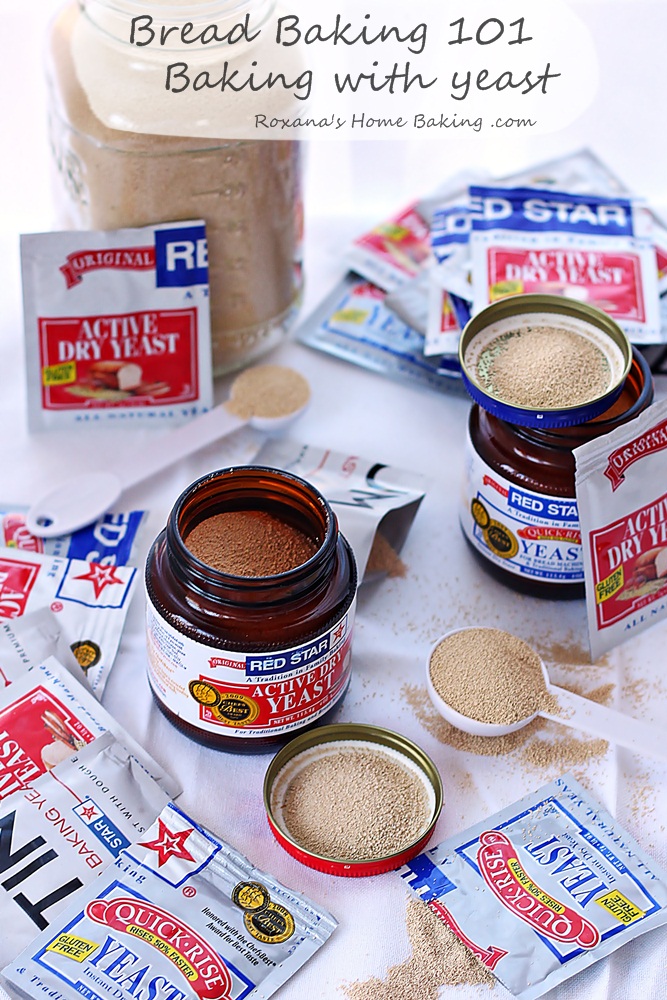
As most of you probably know there are three types of yeast easily available at any supermarket.

Active dry yeast

Rapid rise dry yeast

Instant  dry yeast

I’ve heard people saying that rapid rise yeast and instant yeast are the same, but I don’t think so. I’ve baked with both of them, and although they make the dough rise faster, but the instant one is more forgiving, I’ll talk more about it in a minute.

Active dry yeast

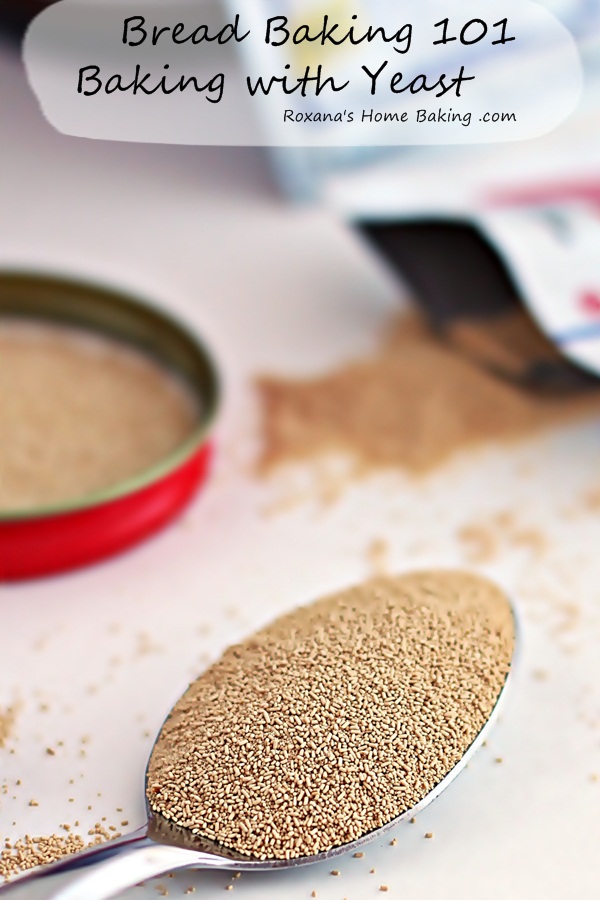
Active dry yeast is definitely the most used dry yeast on the market. Unless otherwise specified, most of the bread recipes are using active dry yeast. It looks like tiny granules which have been dehydrated and put to sleep before packing. Once you mix it with water it wakes up.

Unlike rapid rise and instant yeast, active dry yeast must be proofed before mixing it with the other ingredients. A little sugar or honey can be added when proofing it to jump-start its growth.

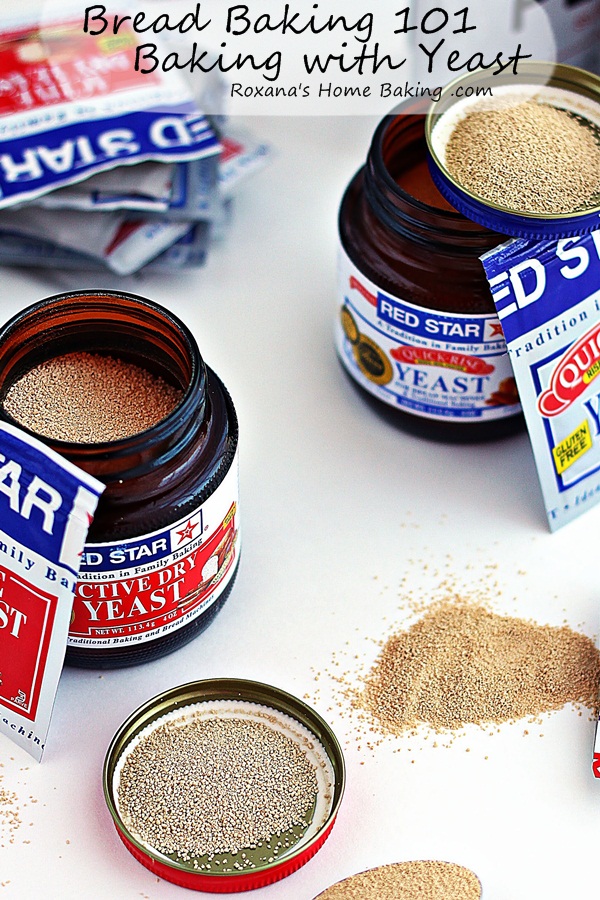
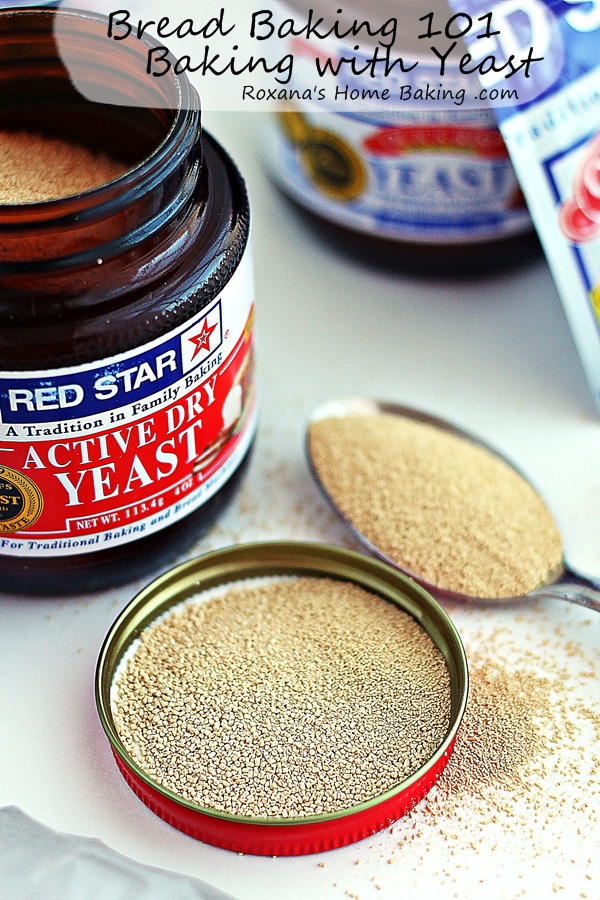
Active dry yeast is mostly available in strips of 3 envelopes (7 grams each) or 4 oz jars manufactured my Red Star Yeast (my preference) and Fleischmann’s.

Rapid rise yeast

Another type of dry yeast, rapid rise, as the name suggests will make your dough rise faster, sometimes in half the time. It is milled a little finer than active dry yeast. Since the granules are smaller in size, you can mix it directly with the flour, without the need to proof it first.

This type of yeast is sometimes found also under the name of “bread machine yeast”.

Instant dry yeast

Instant dry yeast is another type of fast acting yeast, milled even finer. Compared with active dry yeast, instant yeast speeds up the rising time by half. It is designed to be mixed directly with the dry ingredients. When using instant yeast, not only you can skip the proofing but you can skip the first rise as well, shaping the bread as soon as you finished kneading it. I do not recommend doing this, since you’ll lose all the flavor the bread will develop while rising.

There are only a few times when I prefer using rapid rise or instant yeast in my bread recipes. When the dough requires a lot of resting time, like these homemade croissants. Or you can use it in pizza crust and flatbreads, since they are baked as soon as you shape them.

Instant dry yeast is the most forgiving at all. If you still fear baking with yeast I suggest starting with the latest yeast product from Red Start Yeast : PLATINUM. I’ve talked about it when I made croissants, and also used it in my Steakhouse Bread, Cardamom Coconut Buns, Cottage Cheese Dinner Rolls, Plum Cake, Pizza Crust and Flatbread.

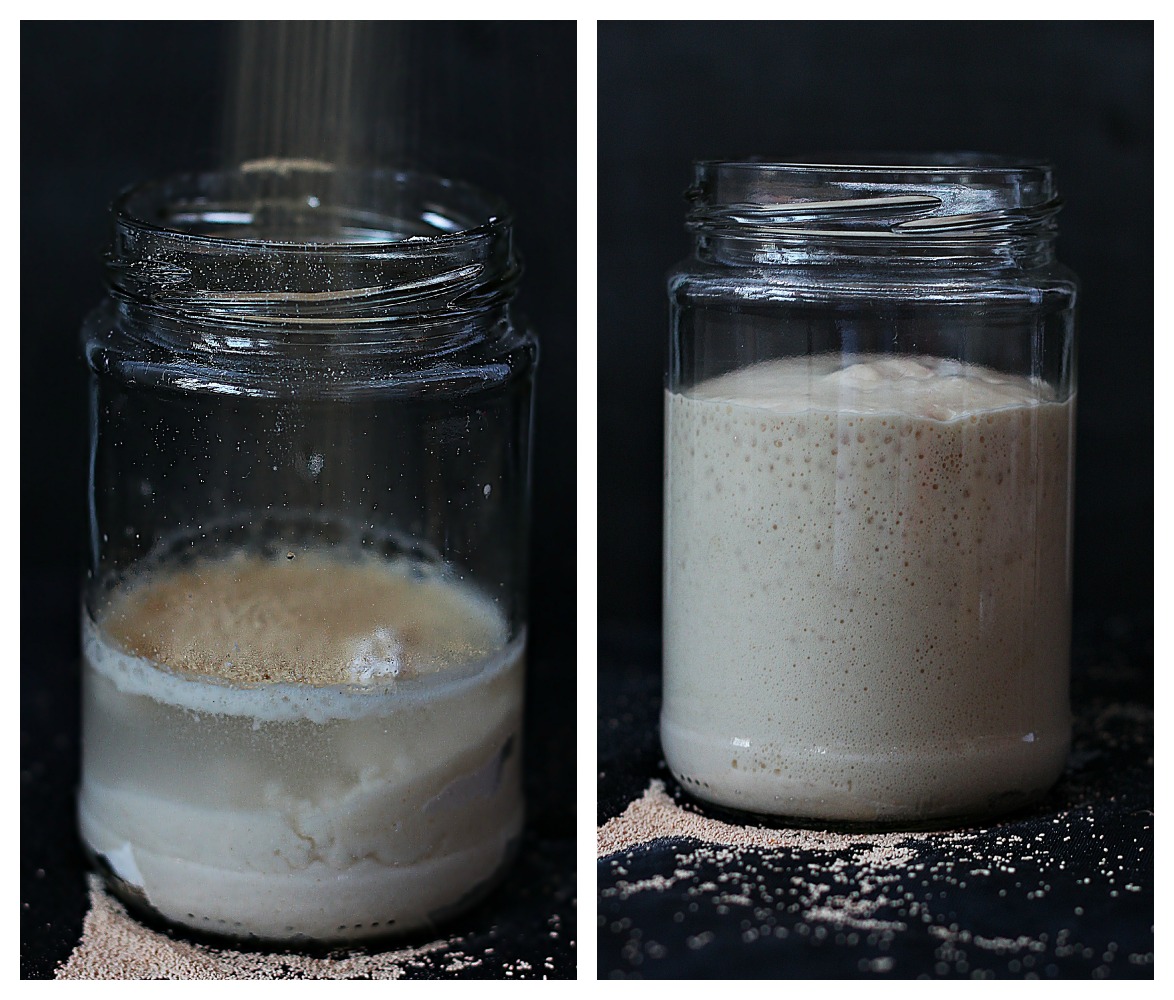
Even tho rapid rise and instant yeasts are designed to be mixed with the dry ingredients, I do not recommend that. No matter what type of yeast you’re using I suggest proofing it. This way you know your yeast is alive. If the yeast is dead, you wasted your time and the other ingredients. Better safe than sorry! 
Bread Baking 101 - Baking with Yeast (types of yeast, proofing and a few tips) from Roxanashomebaking.com

Proofing yeast

Proofing is the process of mixing lukewarm water (or other liquid) with yeast before combining it with the rest of the ingredients. This process can be done in a separate bowl, mixing just the liquid with the yeast and waiting around 5 minutes until foam appear at  the surface.

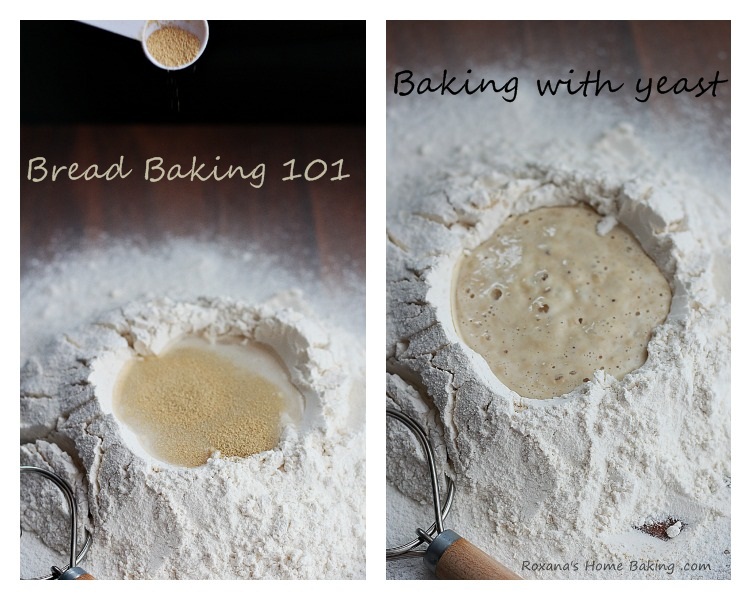
There are other ways to proof yeast, which, lately I use them more often, one of them being the sponge method.

The yeast is mixed with a small amount of water and flour to make a batter. This can be done in a separate bowl or by making a well in the middle of the flour. The better is left to rest for about 10 minutes until bubbles appear at the surface and the mixture has a spongy texture. You’ll have to keep in mind that a wet sponge (one that uses more liquid) will rise quicker than a firm one (one that uses more flour). Since I haven’t shared a recipe for baguette or ciabatta yet I won’t be talking today about the French sponge called poolish or the Italian biga.
Bread Baking 101 - Baking with Yeast (types of yeast, proofing and a few tips) from Roxanashomebaking.com

There are a couple of thing you have to keep in mind when baking with yeast.

– yeast, like all living things, needs four things to survive : warmth, moisture, food and oxygen.

– yeast needs warmth to activate. the water used must be around 105F. Too hot and it will kill your yeast. Too cold the yeast will take longer to activate. If it makes you feel more comfortable, buy an instant thermometer to check the water temperature.

– yeast needs sugar and starch to grow. You don’t necessary need to add sugar, yeast will feed on sugar and starches from the other ingredients used in the dough, which will make the dough to rise.

– yeast needs warmth to feed. Your kitchen temperature should be around 70F, for best results when letting the dough to rise.

– always check the expiration date. there’s nothing more annoying that waiting for your yeast to do its job, weeks or months after it has expired.

– yeast is best stored in the freezer and brought to room temperature just before using it.

– yeast goes back to sleep when temperatures are too low. If you decide not to bake all those rolls or that second loaf of bread, just wrap it well in plastic wrap and place it in the freezer. The rising process will stop soon. Once you decide to bake, just leave at room temperature for about 1-2 hours.

– one envelope of yeast is used for 4 cups of flour. Do not use more thinking you’ll get more bread or you’ll speed up the process. All you’ll end up with is a strong smell and taste of yeast in your bread.
 Bread Baking 101 - Baking with Yeast (types of yeast, proofing and a few tips) from Roxanashomebaking.com

I hope by now I scared your yeast-phobia. If you have questions, leave them in the comments below and will answer them.

Sending love your way,

Roxana

*I’ve asked Red Star Yeast to send me free products to use in my photos. Opinions are all mine. 
Related Posts:

  • Spinach artichoke dip stuffed bread recipe
  • Braided easy egg bread
  • Stollen

Filed Under: Tutorial Tagged With: bread, Bread Baking, bread baking 101, Instant Dry Yeast, Proofing, Proofing Yeast, Rapid Rise Yeast, tutorial, yeast

About Roxana

Roxana has a passion for all things food, a sweet tooth that can’t be tamed and a severe case of the wanderlust
With an audience in search for real food and no fuss recipes, I make midweek meals exciting sharing approachable recipes, both sweet and savory, that taste completely sinful.

« Flatbread with roasted tomatoes
Triple chocolate tart »

Search

Categories

Archives

Comments

  1. Helene Dsouza I Masala Herb says

    January 30, 2013 at 9:04 am

    Thank you for clarifying the difference between Rapid rise dry yeast & Instant dry yeast. The English terms are still new to me and I was wondering what the difference was. Do you know if high humidity can be a factor for the yeast to rise not at all? We were taught to use the sponge method in college and we would use only fresh yeast cubes. I found that fresh yeast is easier to handle then dry yeast, although the latter can be stored much longer and better. I enjoyed your post Roxana, its going to be very helpful. =)
    Reply
    • patrick says

      November 23, 2014 at 7:54 pm

      thanks I was looking for the sponge method of proofing yeast. I have experimented with sugar and water but I like the idea of no added sugar using flour. I have made a sponge several times in the past making pizza. planning on taking it up again but wasnt sure about how much flour to water with yeast. been awhile. rising in the refrigerator is a favorite. lots of added aroma to the dough overnight. I am going to read about kneading next. looking for perfection in a chewy crunch pizza crust. margherita of course
      Reply
  2. CJ at Food Stories says

    January 30, 2013 at 9:48 am

    What a great post - Lots of info :-)
    Reply
  3. Lyn @LovelyPantry says

    January 30, 2013 at 11:10 am

    Thank you so much for this post. I did not realize that proofing should be done upon every use of active dry yeast. My goal is to bake a loaf a month so your series has been very helpful to me. Thank you Roxana!!
    Reply
  4. J'Marinde Shephard says

    January 30, 2013 at 11:39 am

    Thank you SO much for this. Now I know what I was doing wrong.
    Reply
  5. Erin @ Dinners, Dishes, and Desserts says

    January 30, 2013 at 11:44 am

    Great post, you do such a great job of explaining the differences, and making people more comfortable. Love Red Star yeast too, I use it for all my bread baking!
    Reply
  6. Joan@Chocolateandmore says

    January 30, 2013 at 12:22 pm

    Roxana, you'd done a fantastic job on your bread series! I hope it will encourage more people to venture into bread making. The more you make, the easier it get and the better the bread tastes!
    Reply
  7. Laura (Tutti Dolci) says

    January 30, 2013 at 1:07 pm

    Great info, Roxana! Your explanations are so thorough and easy to understand :).
    Reply
  8. Susan P says

    January 30, 2013 at 1:35 pm

    I always use Instant Dry Yeast and wondered whether it could be proofed in warm water as my instructions say to add it to the dry ingredients. I'm going to try the water proofing next time I make a dough. Thanks for these posts. They are very helpful.
    Reply
    • Roxana says

      January 30, 2013 at 1:43 pm

      Hi Susan, yes, instant yeast can be proofed. I suggest using the sponge method for better results. You can also read about it in my previous post about yeast http://roxanashomebaking.com/yeast-tutorial/ Happy Baking, Roxana
      Reply
  9. Kayle (The Cooking Actress) says

    January 30, 2013 at 2:25 pm

    I love this series SO SO much!
    Reply
  10. Lail | With A Spin says

    January 31, 2013 at 12:29 am

    What a great post. No wonder I have some bad experiences with yeast. Now I know what I may be doing wrong.
    Reply
  11. Dorothy @ Crazy for Crust says

    January 31, 2013 at 9:49 am

    Thanks for this Roxana! I've always wondered what the heck the difference was!
    Reply
  12. JulieD says

    January 31, 2013 at 6:56 pm

    Great tips!!
    Reply
  13. Stephanie says

    February 1, 2013 at 1:46 pm

    What about Pizza Instant yeast? Would that work best for a pepperoni roll? I am attempting one this weekend.
    Reply
    • Stephanie says

      February 1, 2013 at 1:49 pm

      Whoops...nevermind! The website says it does not work will in breads or rolls. Thanks for this post!
      Reply
  14. Angela Michels says

    February 1, 2013 at 8:22 pm

    I am a little confused about proofing. I understand that I add the yeast to warm water prior to putting it with the rest of my ingredients. Do I measure out the exact amount of yeast the recipe calls for or do I just proof a little bit to see if the yeast is good? Also pretty much the same question for the water if I use a 1/4 cup of water to proof the yeast, do I then subtract it from the recipe?
    Reply
    • Roxana says

      February 1, 2013 at 9:38 pm

      Hi Angela, I proof the whole amount of yeast (unless you're baking a lot it's usually between 1 to 2 tsp) with 1/4 water which it's then subtracted from the whole amount of liquid. Lately I got into the habit of writing water twice in the ingredients list to make sure there is confusion about the quantity. Hope that answered your question, let me know if you have more. Roxana
      Reply
  15. marguerite says

    February 7, 2013 at 2:13 pm

    Thanks so much for this awesome informative post!!! I'm a bit of a yeast-o-phobe... even though whenever I use it, it seems easier than I thought it would be. I'm keeping this post as a handy reference!!
    Reply
  16. Angie@Angie's Recipes says

    February 18, 2013 at 8:17 am

    A very informative yeast post, Roxana. Thanks for sharing.
    Reply
  17. kathleen says

    March 7, 2013 at 3:13 pm

    how would I gauge how much dry yeast I need to bake bread if recipe calls for fresh yeast, as most older recipes do :( Can i use your 1 envelope to the 4 cups method? It's an older recipe from back home. Thanks Kat
    Reply
    • Roxana says

      March 7, 2013 at 10:20 pm

      Hi Kat, You're right. You can use one envelope (7 grams) of dry yeast for every 4 cups of flour instead of fresh yeast. The results will be the same. Happy baking, Roxana
      Reply
  18. ally says

    April 4, 2013 at 6:49 pm

    This is helping me out a lot. I've been learning to make my own bread and I can't seem to get it to rise right and get fluffy. It tastes great but is dense. I'm going to try a few different things to get it right. I'm saving this page to reference. Thanks.
    Reply
  19. Rachel Lyn says

    June 12, 2013 at 7:09 pm

    Thank you so much for the Bread Baking 101 posts. I love making fresh bread, but it wasn't turning out like I wanted it to. I just knew that I was missing something being a self-taught baker. Every other article labeled as "Tips and Tricks" was just another recipe that didn't add any insight for my troubles. Then I finally found your sight. These posts finally had the information that I had been looking for. My bread isn't perfect yet, but it improves each and every loaf. Thank you so much for spending the time to write down all of this information!!
    Reply
  20. Gina says

    October 11, 2013 at 7:49 pm

    LOVE this post. Thank you. I can never get my bread to rise or my yeast to proof correctly. So frustrating because I love making my own bread. I have the Platinum & have been storing it in the fridge. Tried some of the instant packets the other day & followed the directions- didn't rise at all. So wish it would have turned out. I will tray again using your tips. I am determined to get it right.
    Reply
  21. tiga says

    February 2, 2014 at 9:43 am

    I've just purchased cake yeast... but couldn't find any information about equivalents in your blog. If I'm to use 1kg (1000gr) of bread flour, how many grams of the cake yeast should i use? tiga
    Reply
    • Roxana says

      February 2, 2014 at 4:11 pm

      Hi Tiga, I have never used fresh yeast in my baking but from what I read 25 grams fresh yeast = 7 grams dry yeast For 1Kg flour you'll have to use 50 grams of fresh yeast
      Reply
      • Tiga says

        February 5, 2014 at 11:33 am

        Worked like a charm... thanks... I had 150 grams total, so I have enough for two more recipes. The rest I've frozen. Am I to understand freezing yeast will not harm it?
        Reply
  22. Mikayla Bowen says

    November 23, 2014 at 2:14 pm

    How much water do you use for a teaspoon of yeast?
    Reply
    • Roxana says

      November 26, 2014 at 3:58 pm

      Hi Mikayla, I usually use 1/4 cup of water.
      Reply

Leave a Reply Cancel reply

Your email address will not be published. Required fields are marked *

Hi there! I'm Roxana. I have a passion for all things food, a sweet tooth that can’t be tamed and a severe case of the wanderlust. I make midweek meals exciting by sharing approachable recipes, both sweet and savory, that taste completely sinful. Read More →

Popular Posts

  • Carmelitas – caramel chocolate oatmeal bars
  • Blog’n Bake Retreat
  • Red velvet whoopie pies with cream cheese frosting
  • Avocado hummus
  • Romanian Easter bread – Pasca
Copyright © a trEATs affair, All Rights Reserved Unless otherwise stated, all images and content are the sole property of Roxana Yawgel and http://atreatsaffair.com/. No photographs or other content may be used without prior written consent.

Copyright © 2023 · Design Customized by Snixy Kitchen